5VY breather modifications

I carried out these changes before starting this blog, but I thought I would post it up now in case the details are of use to anyone.

I take no credit for this modification, that all goes to the builders on the Locost Builders forum, and in particular the participants on this thread

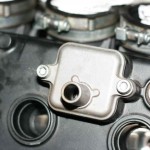
I started by removing the pair of AIS covers from the cam shaft cover which exposed the reed valves. Read more

Installing the sump baffle plate and uprated clutch springs

I installed the sump baffle plate and clutch springs before starting this blog, but I thought I would post it up now in case the details are of use to anyone.

Previously, I had stripped the engine of the loom, and the coolant plumbing. I had also removed the AIS system, and the throttle bodies.

I started by removing the clutch cover, and then removed the clutch spring bolts and springs themselves. It was a simple job to put the new springs and bolts in, and I torqued them up to the correct value, finally adding a dab of torque seal to each bolt to show that I had indeed checked the torque. This is something I intend to do throughout the build, hopefully demonstrating to the IVA examiner that I have applied thought and care during the build process. The clutch cover was then replaced, taking care to make sure the lever was in the right place. Read more
Dismantling the drive shafts

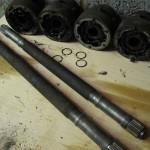
I had an hour to spare today, so I dived into the garage and set about taking the drive shafts apart. The bolts holding on the stub axles (I think that’s what they are called!) proved a bit more difficult to remove than those holding the differential flanges on. After liberal amounts of WD40 I mounted them in the vice, and tapped the torx socket home to make sure it had as much purchase as it could. Read more

The drive shafts have arrived

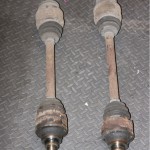
The drive shafts arrived today. They are from a 1990 4×4 Sierra. I am very pleased with my first auction win on eBay, they shouldn’t take too much work to refurbish and get looking good as new. The same seller had some difficult to find 100mm non-LSD (equal length) Lobro flanges as well, which he sold to me at a knock down price and no extra postage – bargain!

Read more

The story so far…

The first stage of the build was to organise a visit to Raw to take a look around, ask lots of questions, and test drive the car. As the Striker is so diminutive, I had a concern that I would be too big to fit, but I needn’t have worried, as I in fact needed a booster cushion to reach the pedals. I knew I was making the correct decision almost immediately, the car was very solid, and even though the sun was low in the sky and reflecting off of wet roads, I thoroughly enjoyed the half an hour or so that I had driving.

Read more